
Setting Up OnlinePay
OnlinePay is the Verifone gateway sold by Westpac, St.George, BankSA and Bank of Melbourne. The setup is the same whichever of the four your merchant facility is with, and you collect your credentials from your own bank's OnlinePay portal.
Required Credentials
User ID
API Key
Payment Provider Contract ID
Entity ID
3DS Contract ID (optional, required for 3D Secure)
Camper BMS provides technical integration only. Your OnlinePay merchant account must be active before payments will function.
OnlinePay or your acquiring bank may require you to complete PCI DSS compliance requirements.
Camper BMS does not provide PCI certification or compliance assessments.
Camper BMS does not store, process, or transmit full payment card details.
You can learn more about what security controls Camper BMS has in place here.
Finding Your Credentials
Log in to your OnlinePay administration portal, then work through the sections below to collect each credential. The User ID, Entity ID and both contract IDs are each 36 characters in the form 123e4567-e89b-12d3-a456-426614174000, and each one is a different value.
User ID
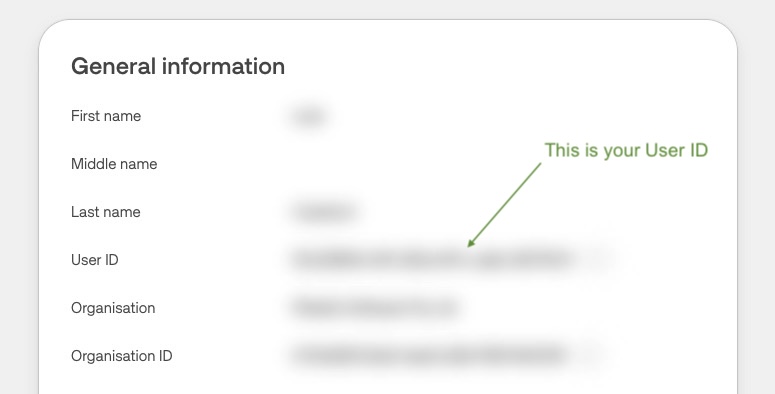
Open the account menu in the top right corner of the portal and click My Account.
Your User ID is listed under General information.
API Key
Open the account menu in the top right corner and click API Keys.
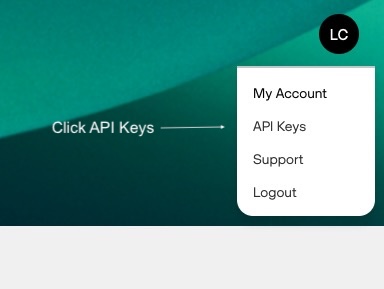
Click Create API Key.

In the API Key Created dialog, click Copy public key and store the key somewhere safe.
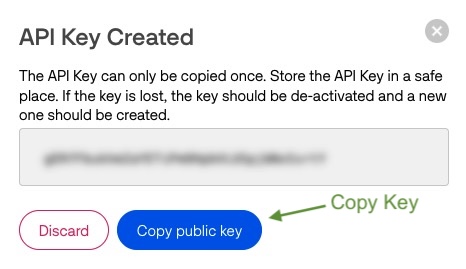
The API key can only be copied once. If you lose it, de-activate that key and create a new one.
Payment Provider Contract ID
Go to Administration > Payment Provider Contracts.
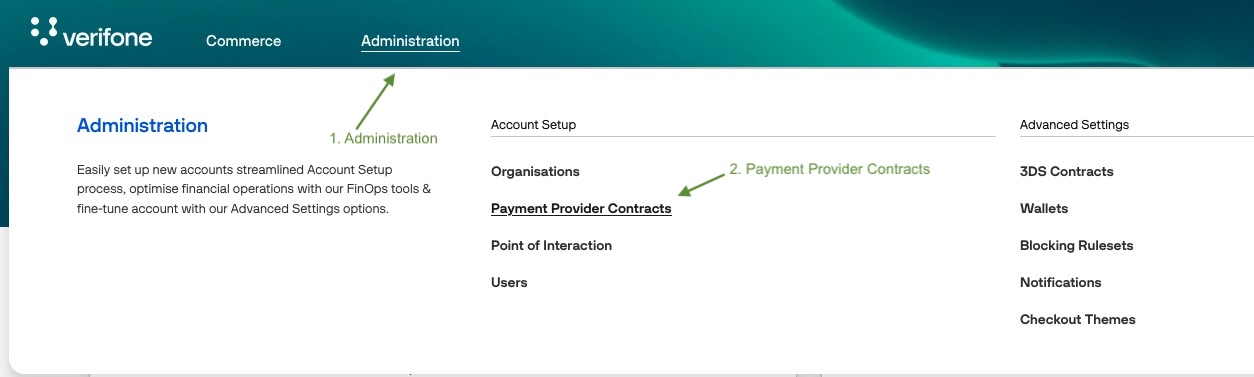
Select your contract from the list.
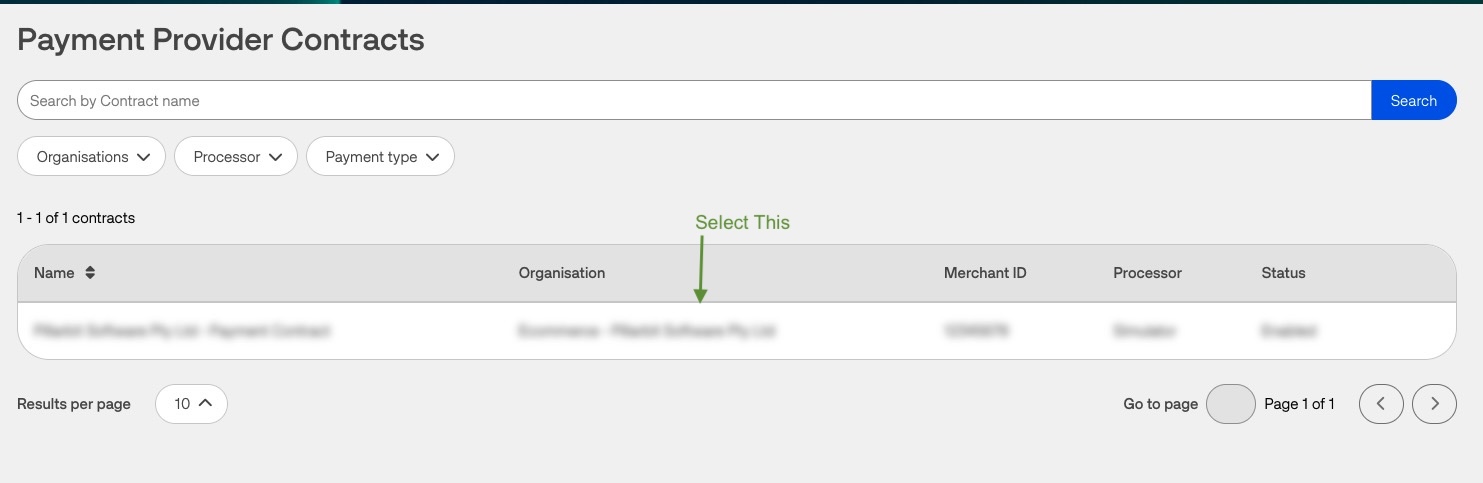
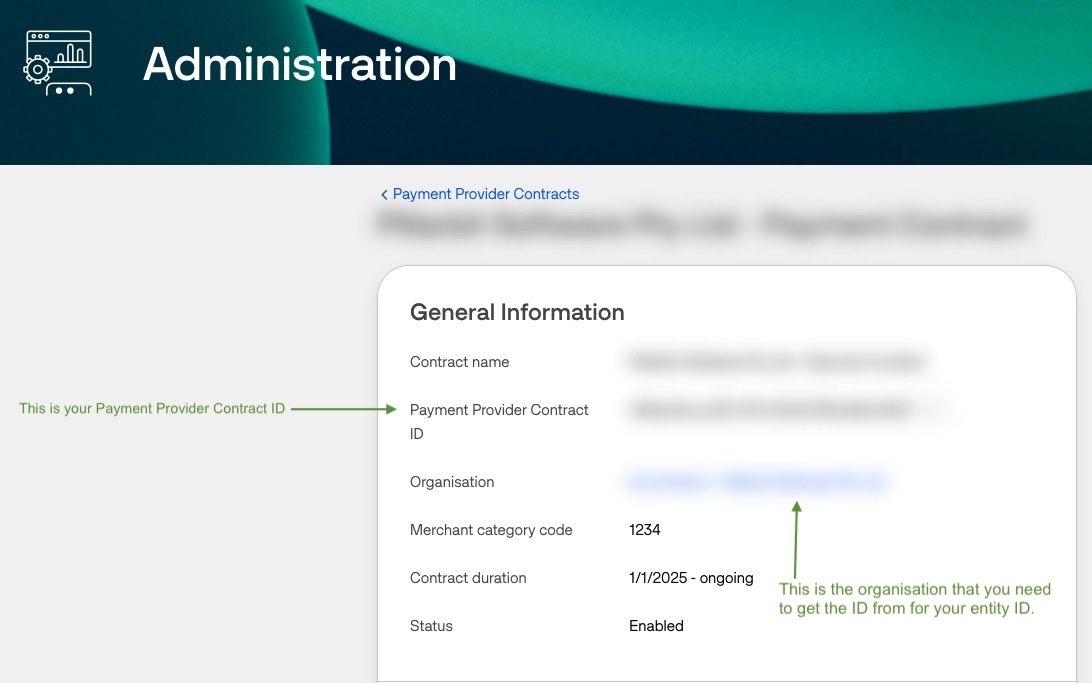
Your Payment Provider Contract ID is listed under General Information.
Entity ID
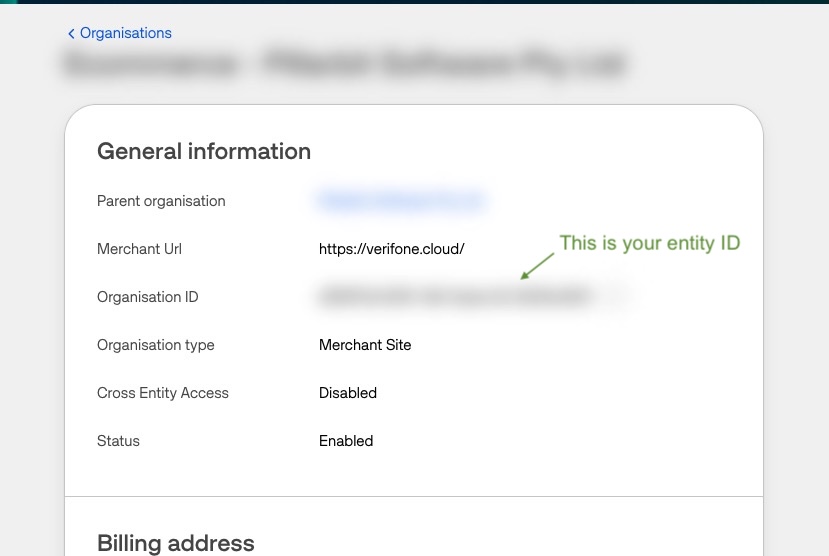
On that same contract page, click the Organisation linked to the contract. If your account has more than one organisation, this is the one to use - the Entity ID must belong to the organisation linked to your Payment Provider Contract.
The Organisation ID listed under General information is your Entity ID.
3DS Contract ID (optional)
You only need this if you intend to use 3D Secure.
Go to Administration > 3DS Contracts.
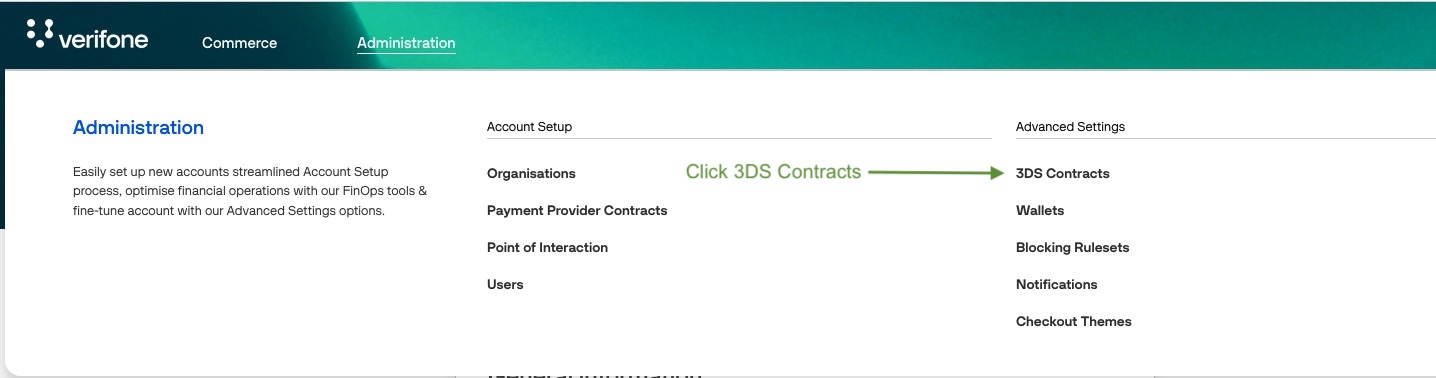
Select your 3DS contract from the list.
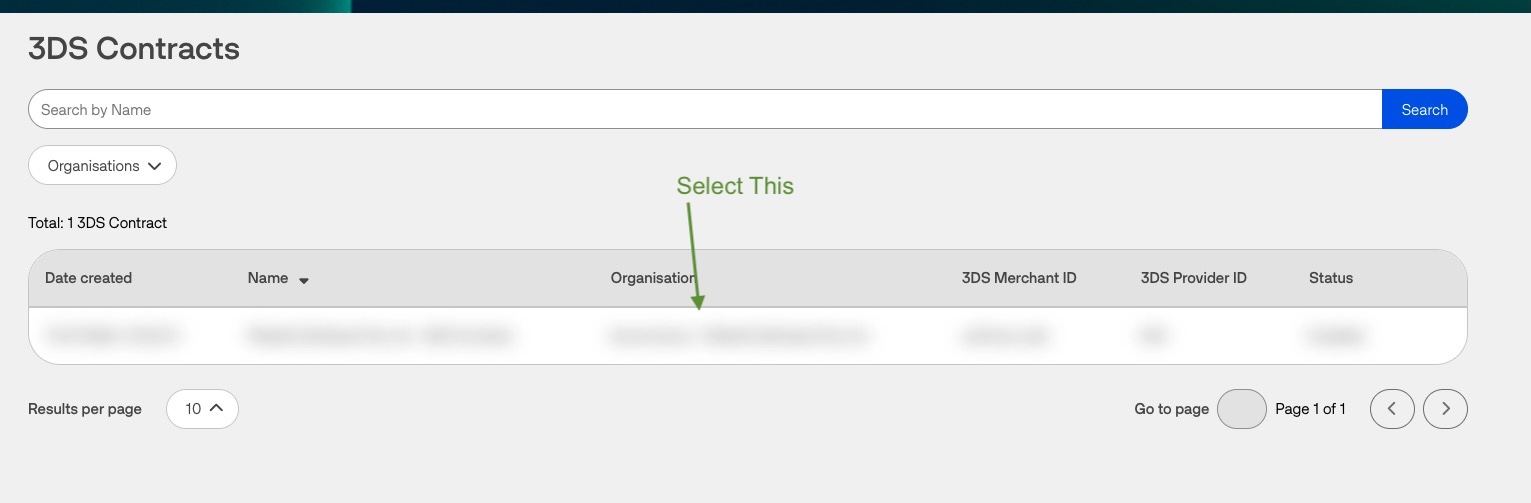
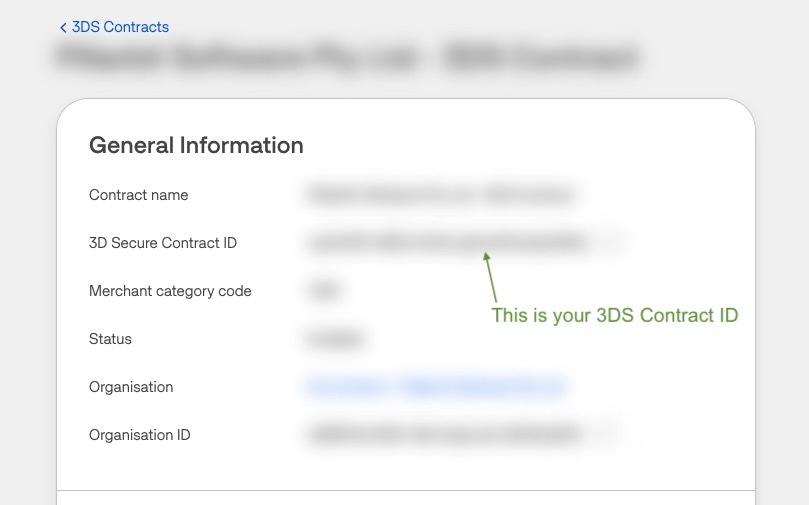
Your 3DS Contract ID is listed as 3D Secure Contract ID under General Information.
Entering Credentials in Camper BMS
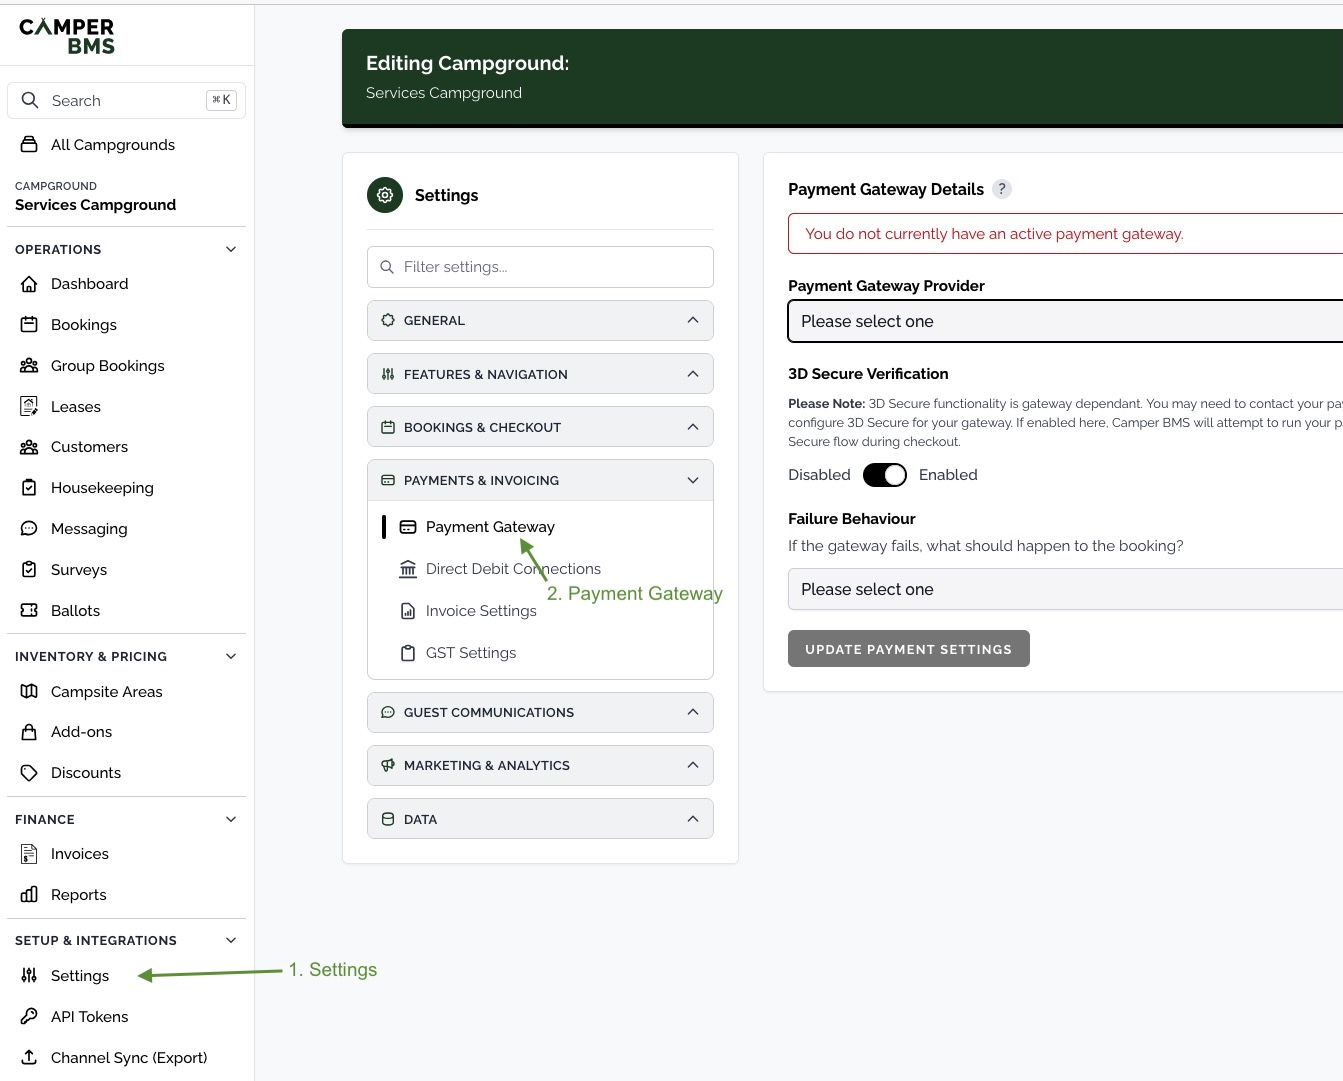
Navigate to Settings > Payments & Invoicing > Payment Gateway.
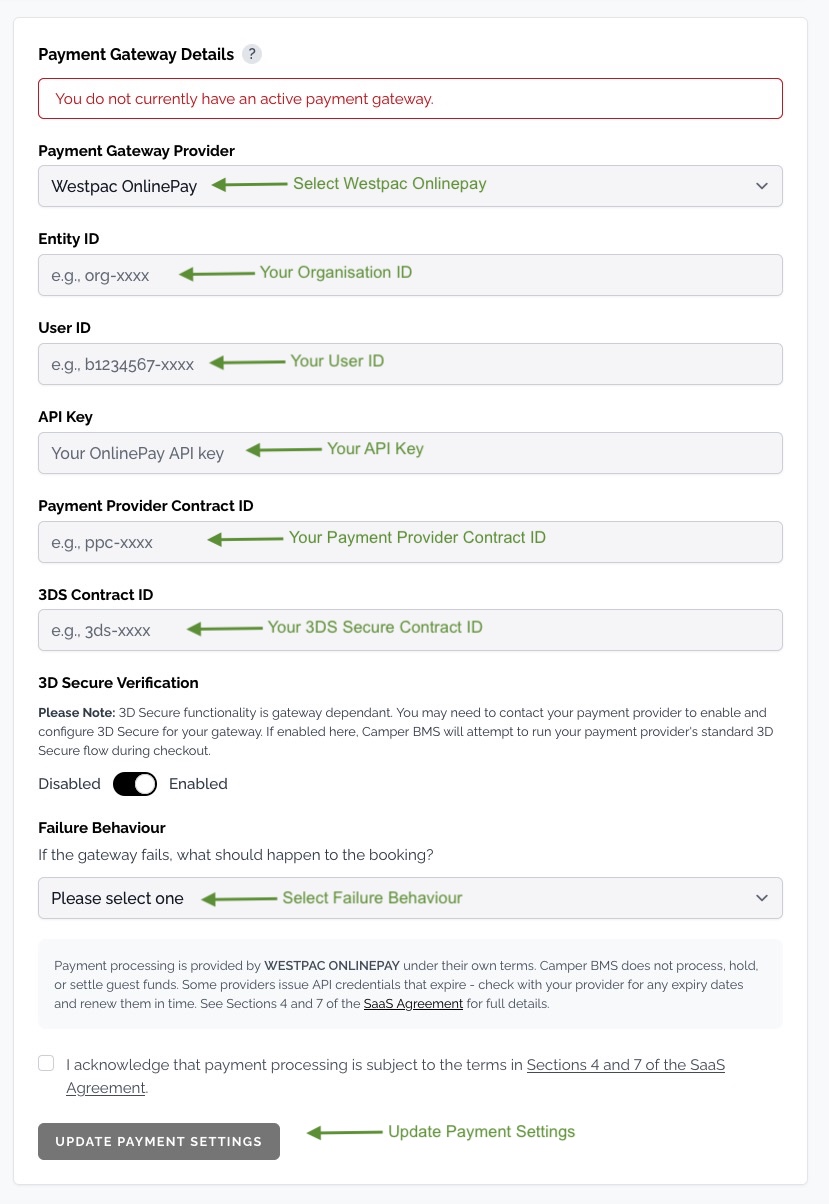
Select OnlinePay from the Payment Gateway Provider drop-down.
Enter your Entity ID, User ID, API Key, Payment Provider Contract ID, and optionally the 3DS Contract ID in the corresponding fields.
Optionally enable 3D Secure Verification. This requires a 3DS Contract ID, and you may need to contact your bank to have 3D Secure enabled on your merchant account first.
Choose a Failure Behaviour - this controls what happens to a booking if the gateway declines or fails the payment.
Tick the acknowledgement to accept the payment processing terms, then click Update Payment Settings. Camper BMS checks the details with OnlinePay before saving them: that the User ID and API Key are accepted, and that a payment page can be opened with your Entity ID and Payment Provider Contract ID (and your 3DS Contract ID when 3D Secure is on). Nothing is charged. If a value is wrong, the message under that field tells you which one to copy again and nothing is saved.
Apple Pay and Google Pay
Guests can pay with Apple Pay or Google Pay through your OnlinePay account. The buttons appear in the OnlinePay payment form on your booking checkout and on online invoice payment pages.
Apple Pay shows to guests on an iPhone, iPad or Mac using Safari.
Google Pay shows to guests using Chrome or an Android phone with a saved card.
Adding the Wallets in OnlinePay
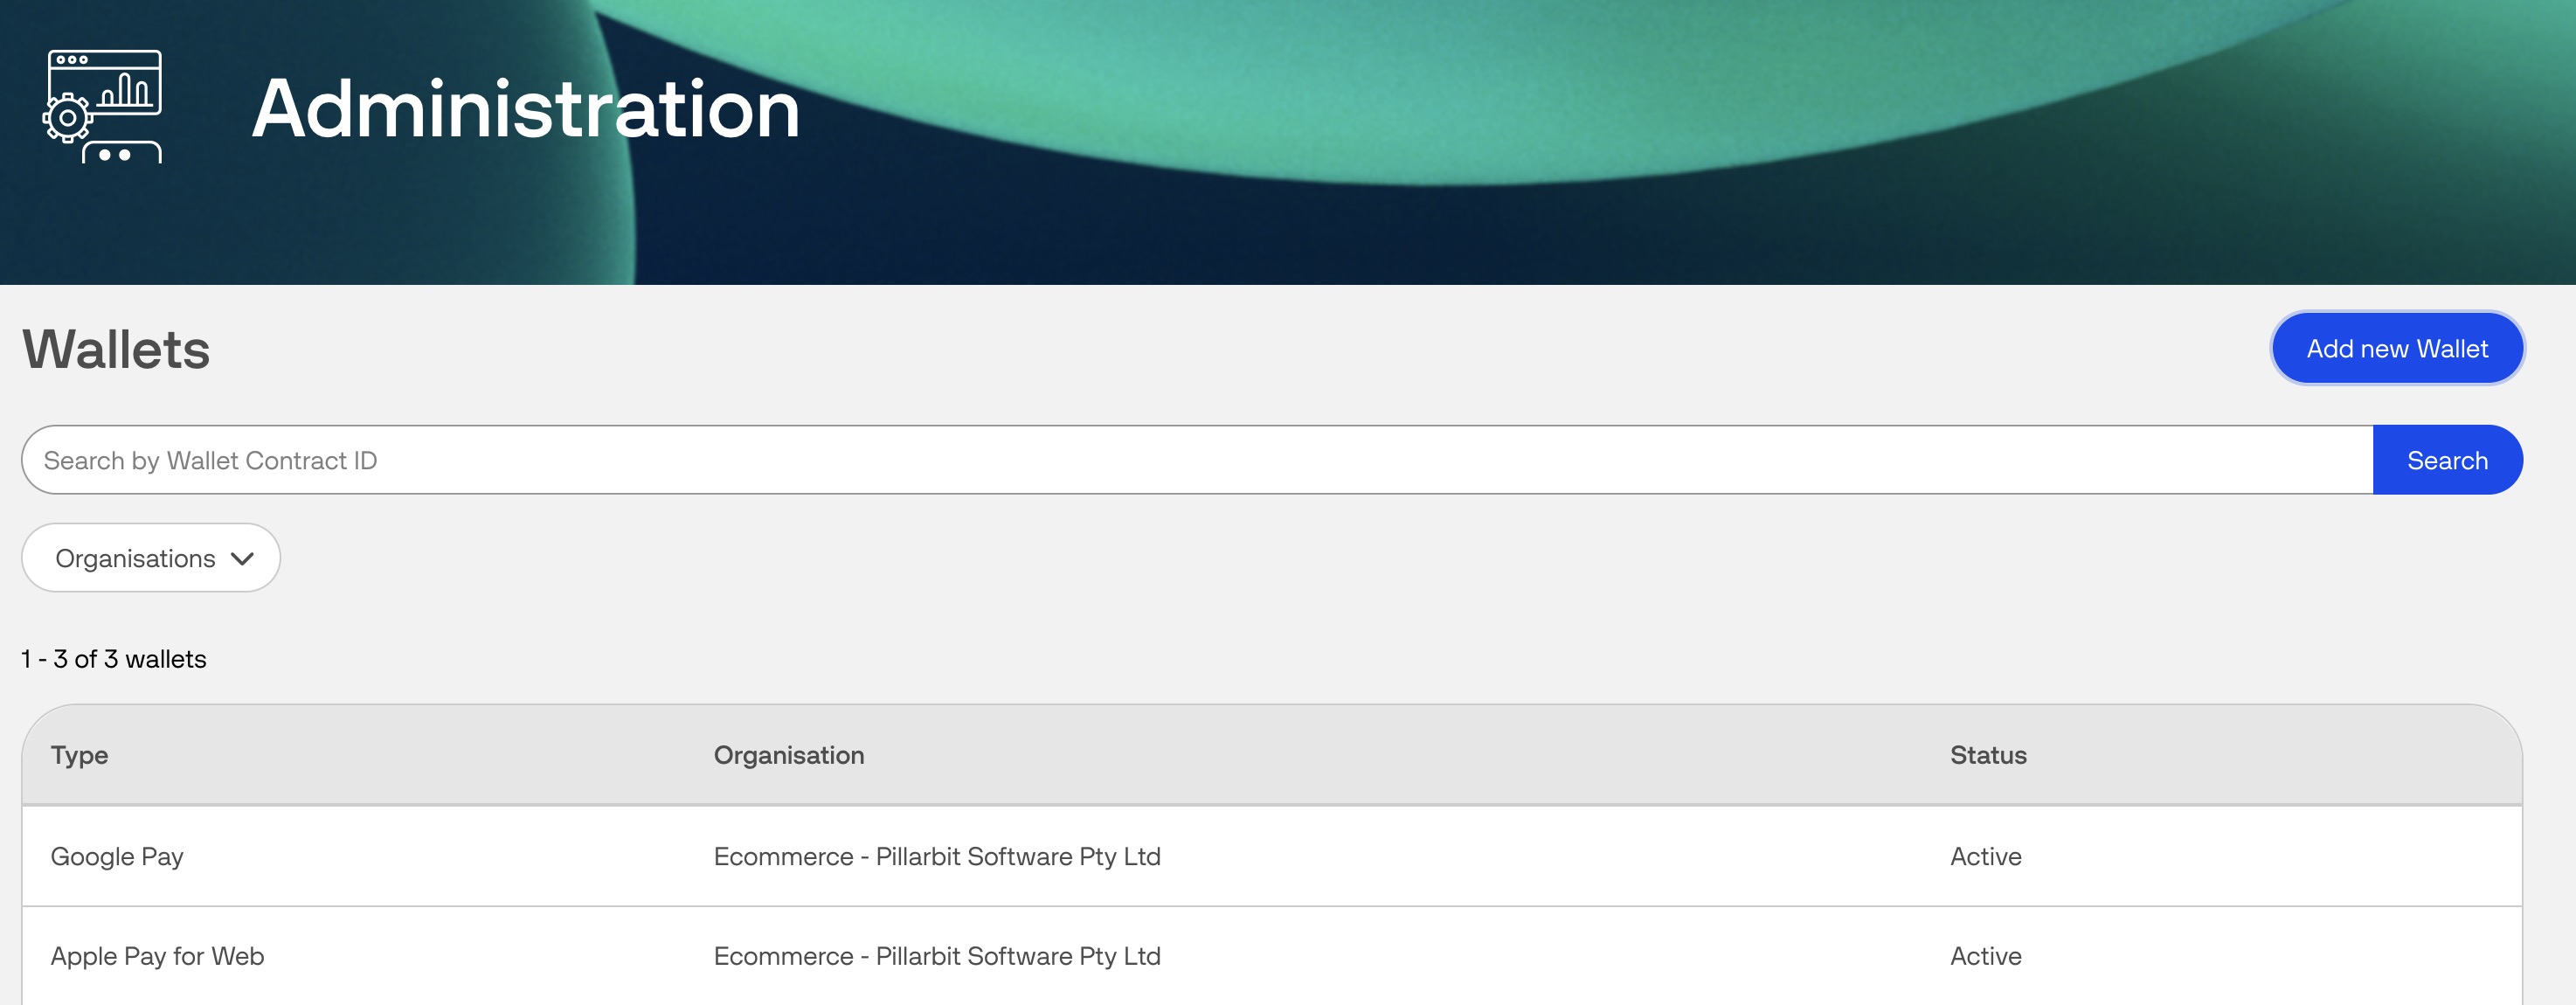
In your OnlinePay administration portal, go to Administration > Advanced Settings > Wallets and click Add new Wallet.
Under Organisation, select the organisation linked to your Payment Provider Contract.
Under Wallet type, choose Apple Pay for Web. Leave Enable Apple Pay for web via direct API unticked, then click Add Wallet.
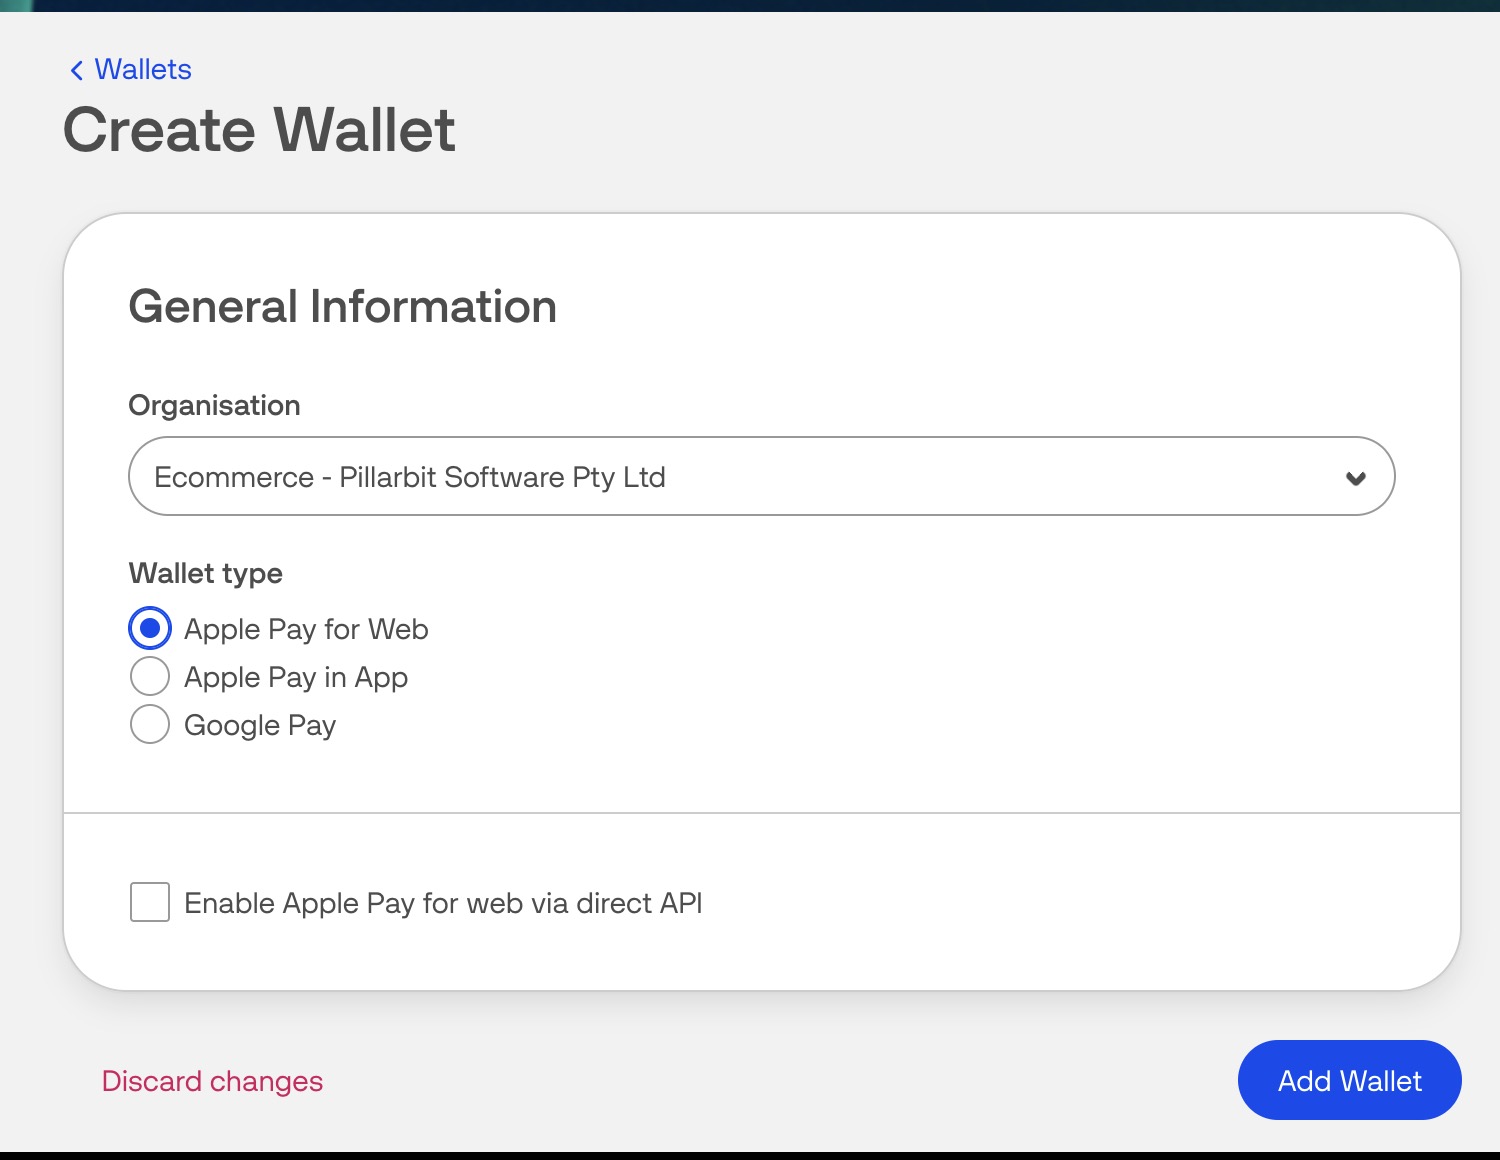
Click Add new Wallet again, select the same organisation, choose Google Pay, then click Add Wallet.
Both wallets are listed on the Wallets page with the status Active.
Turning Them On in Camper BMS
Navigate to Settings > Payments & Invoicing > Payment Gateway.
Under Wallet payments, switch Apple Pay and Google Pay on or off.
Both wallets are available as soon as they are switched on. If a wallet is not set up on your OnlinePay account, guests see the card form only.
How Wallet Payments Show
A wallet payment is recorded against the booking or invoice with the wallet used. For example: Apple Pay. Refunds work the same way as card payments.
If you switch to a different payment gateway, Apple Pay and Google Pay are switched off.
Setting Up the Payment Webhook (recommended)
The payment webhook tells Camper BMS as soon as OnlinePay takes a payment, so the booking or invoice is marked paid straight away, even if the guest closes the page before it finishes.
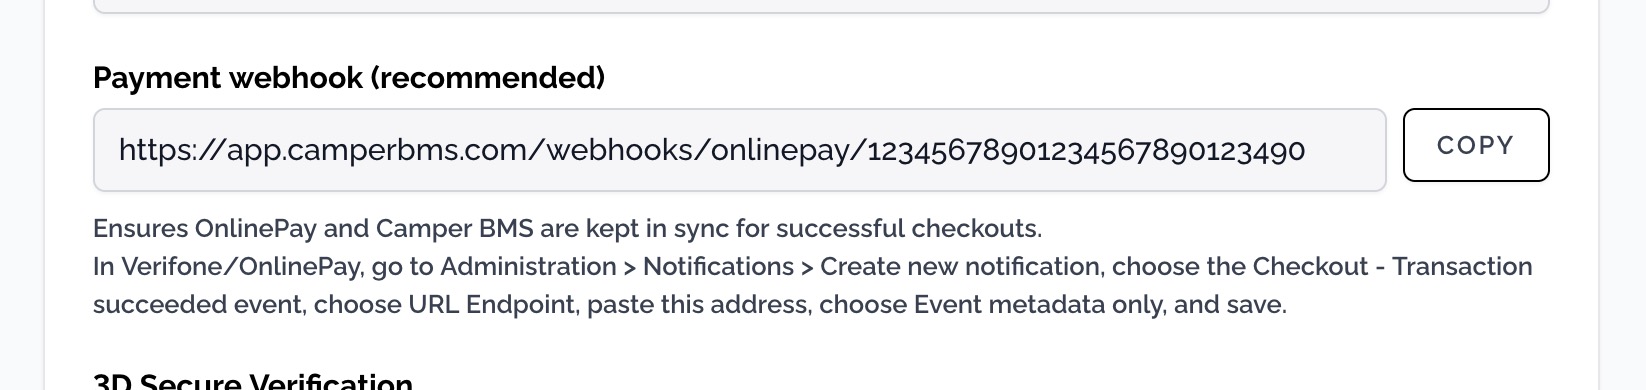
The webhook address appears once your OnlinePay details are saved in Camper BMS. When you first save OnlinePay as your payment gateway, a Set up the payment webhook window opens with the address, a Copy button and the steps below.
Navigate to Settings > Payments & Invoicing > Payment Gateway. Under Payment webhook (recommended), click Copy.
In your OnlinePay administration portal, go to Administration > Notifications and click Create new notification.
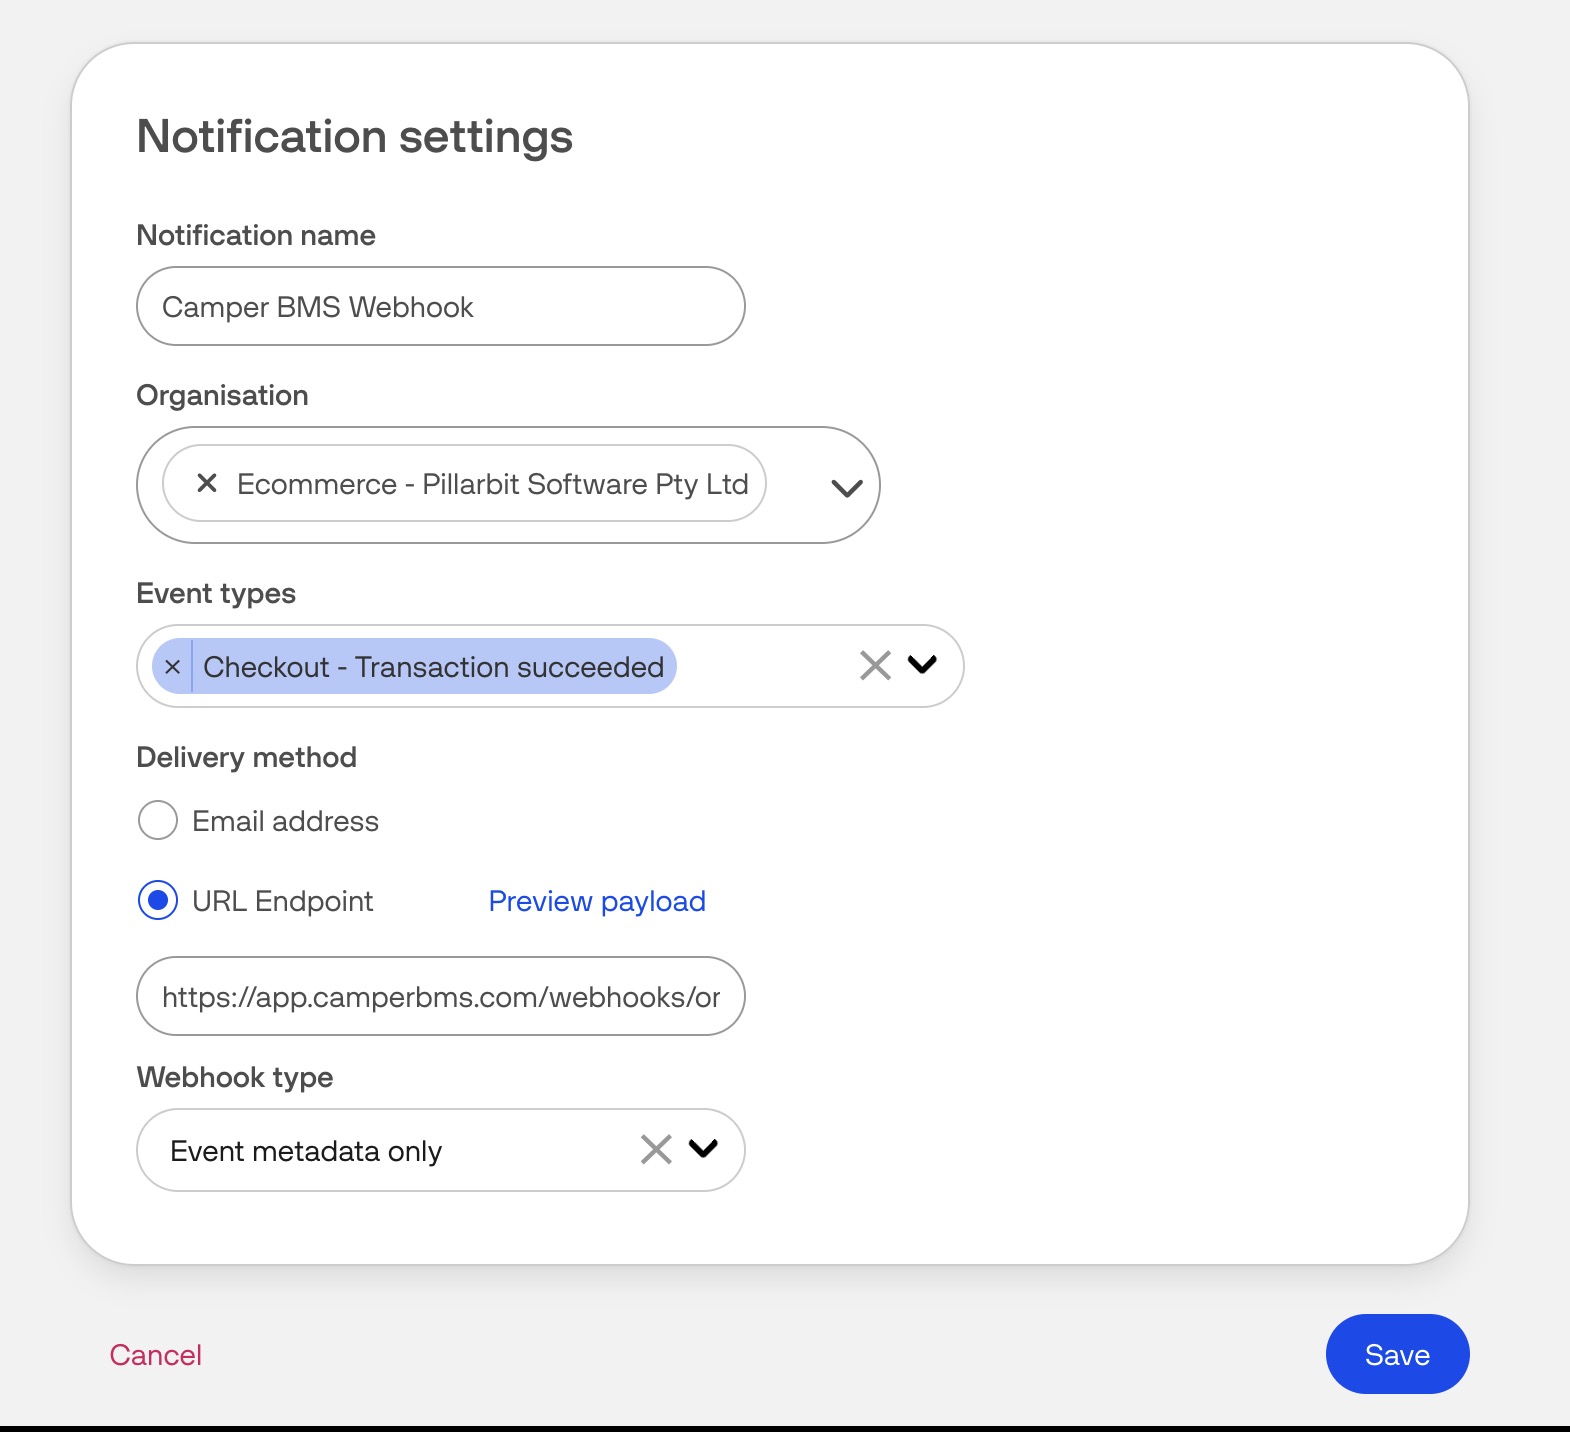
Enter a Notification name, for example Camper BMS Webhook.
Under Organisation, select the organisation linked to your Payment Provider Contract.
Under Event types, choose Checkout - Transaction succeeded.
Under Delivery method, choose URL Endpoint and paste the address you copied.
Under Webhook type, choose Event metadata only, then click Save.
The webhook address is unique to your campground. Keep it private, and only paste it into your own OnlinePay portal.
Checking the Webhook Is Working
Navigate to Settings > Payments & Invoicing > Payment Gateway. Under Your Payment Gateway Is Connected, a line shows the webhook status:
Payment webhook last received (green) shows the date and time OnlinePay last sent an event to Camper BMS.
No payment webhook events received yet (grey) shows until OnlinePay sends its first event. It is sent after your next online payment.
No webhook event was received for the OnlinePay payment taken (red) shows the date and time of an online payment that OnlinePay sent no event for. Check the notification in your OnlinePay portal uses the Checkout - Transaction succeeded event and the webhook address from Camper BMS. The line turns green after the next payment that OnlinePay sends an event for.
Related articles
Still need a hand?
Our support team is happy to help.
Contact support