
Setting Up Westpac OnlinePay
Required Credentials
User ID
API Key
Payment Provider Contract ID
Entity ID
3DS Contract ID (optional, required for 3D Secure)
Camper BMS provides technical integration only. Your OnlinePay merchant account must be active before payments will function.
OnlinePay or your acquiring bank may require you to complete PCI DSS compliance requirements.
Camper BMS does not provide PCI certification or compliance assessments.
Camper BMS does not store, process, or transmit full payment card details.
You can learn more about what security controls Camper BMS has in place here.
Finding Your Credentials
Log in to your Westpac OnlinePay administration portal, then work through the sections below to collect each credential.
User ID
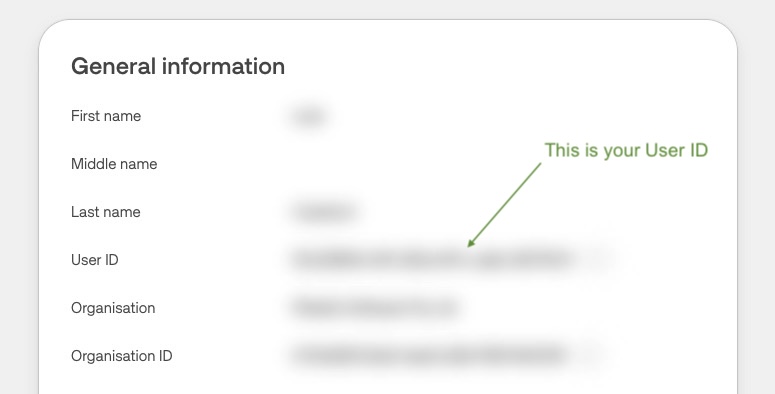
Open the account menu in the top right corner of the portal and click My Account.
Your User ID is listed under General information.
API Key
Open the account menu in the top right corner and click API Keys.
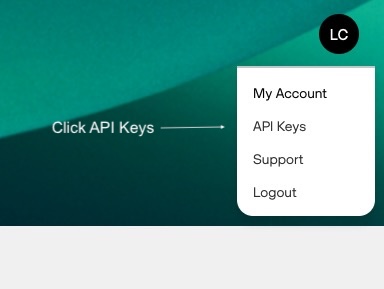
Click Create API Key.

In the API Key Created dialog, click Copy public key and store the key somewhere safe.
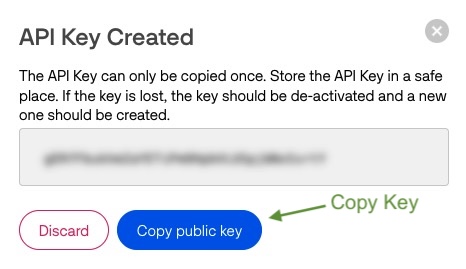
The API key can only be copied once. If you lose it, de-activate that key and create a new one.
Payment Provider Contract ID
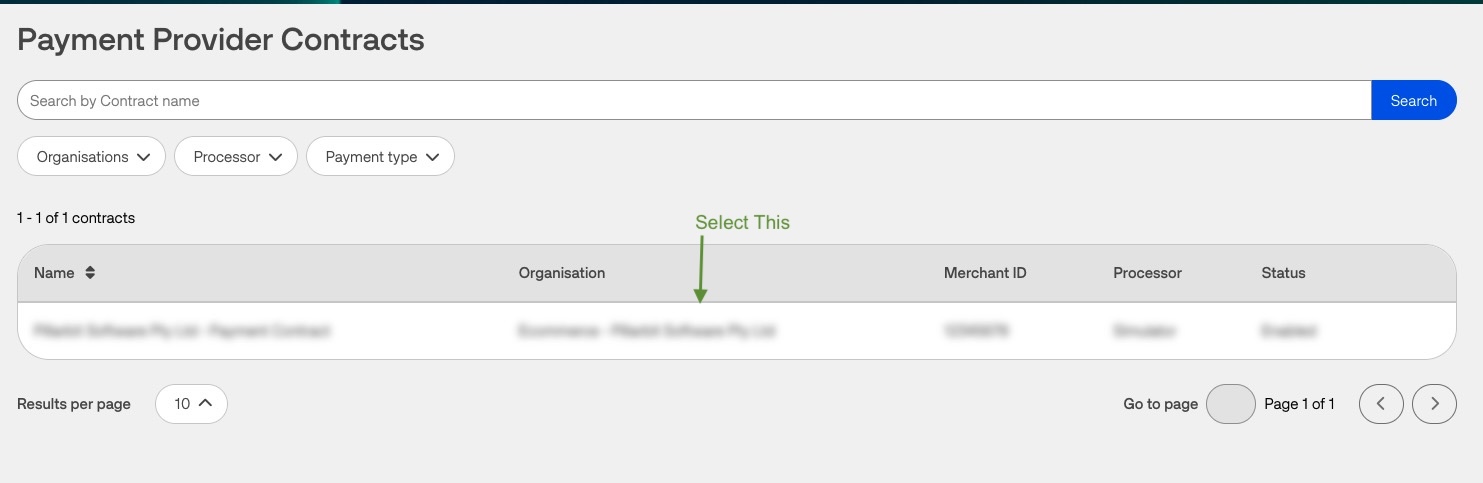
Go to Administration > Payment Provider Contracts.
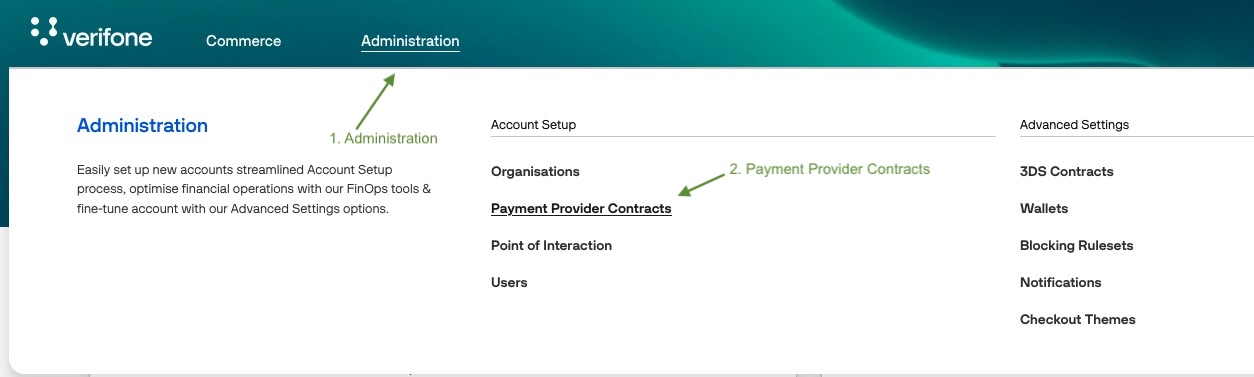
Select your contract from the list.
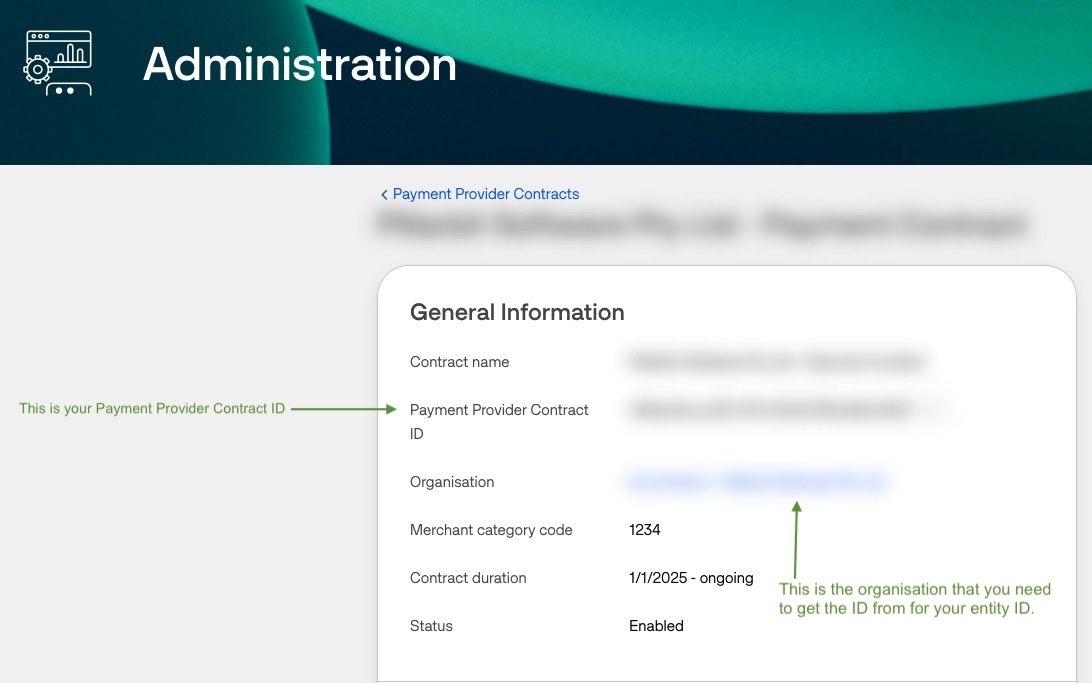
Your Payment Provider Contract ID is listed under General Information.
Entity ID
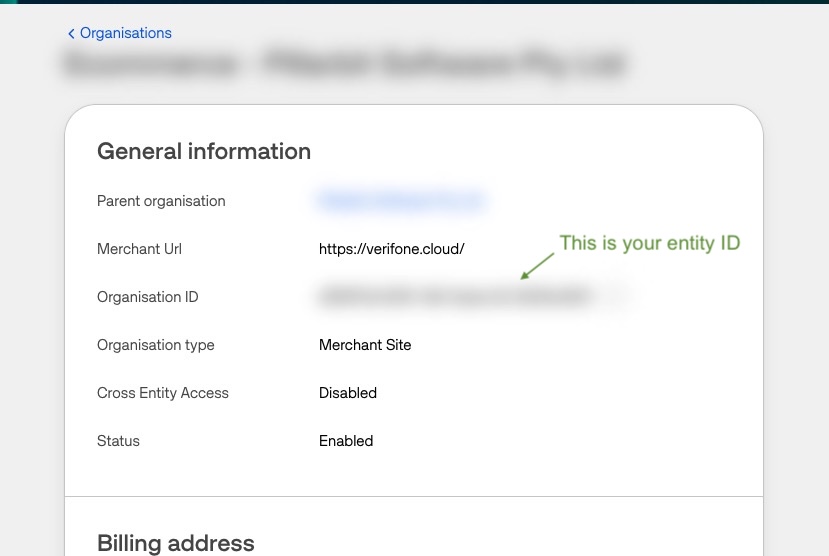
On that same contract page, click the Organisation linked to the contract. If your account has more than one organisation, this is the one to use - the Entity ID must belong to the organisation linked to your Payment Provider Contract.
The Organisation ID listed under General information is your Entity ID.
3DS Contract ID (optional)
You only need this if you intend to use 3D Secure.
Go to Administration > 3DS Contracts.
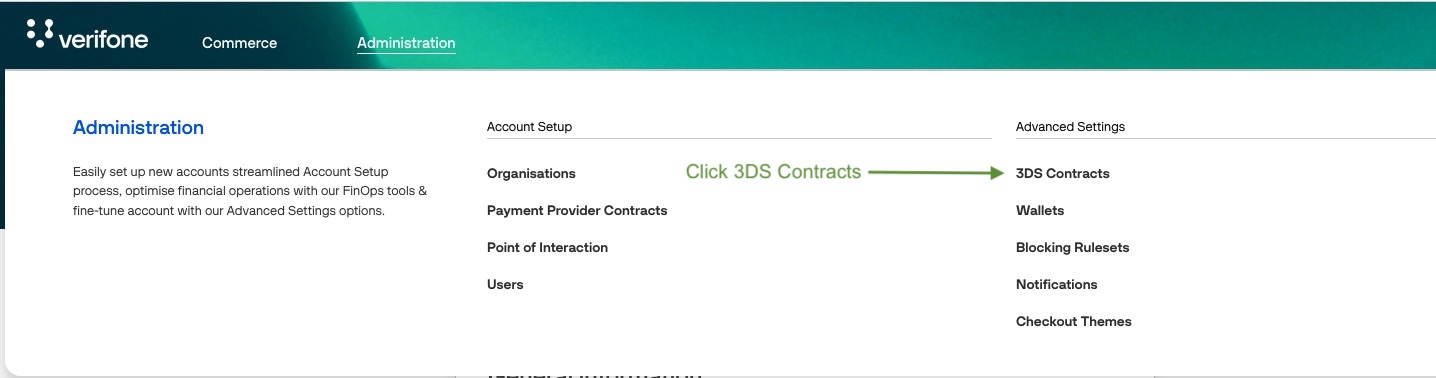
Select your 3DS contract from the list.
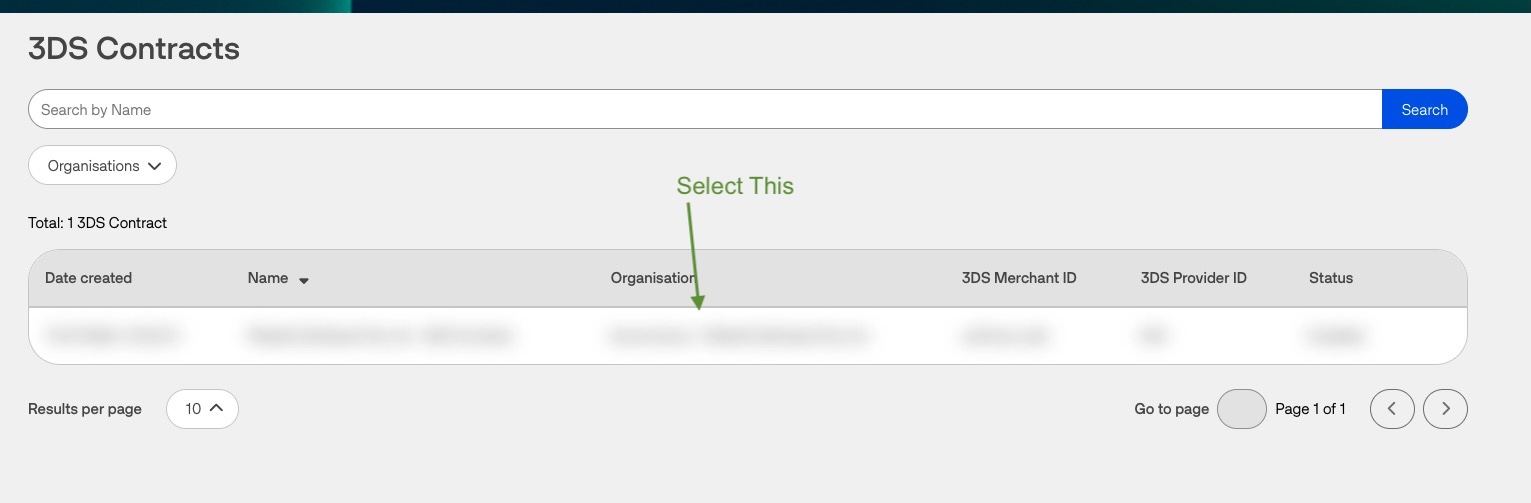
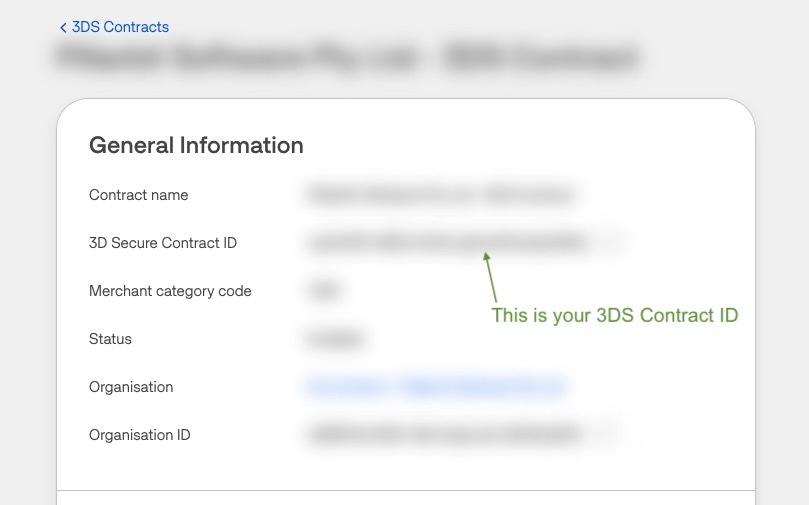
Your 3DS Contract ID is listed as 3D Secure Contract ID under General Information.
Entering Credentials in Camper BMS
Navigate to Settings > Payments & Invoicing > Payment Gateway.
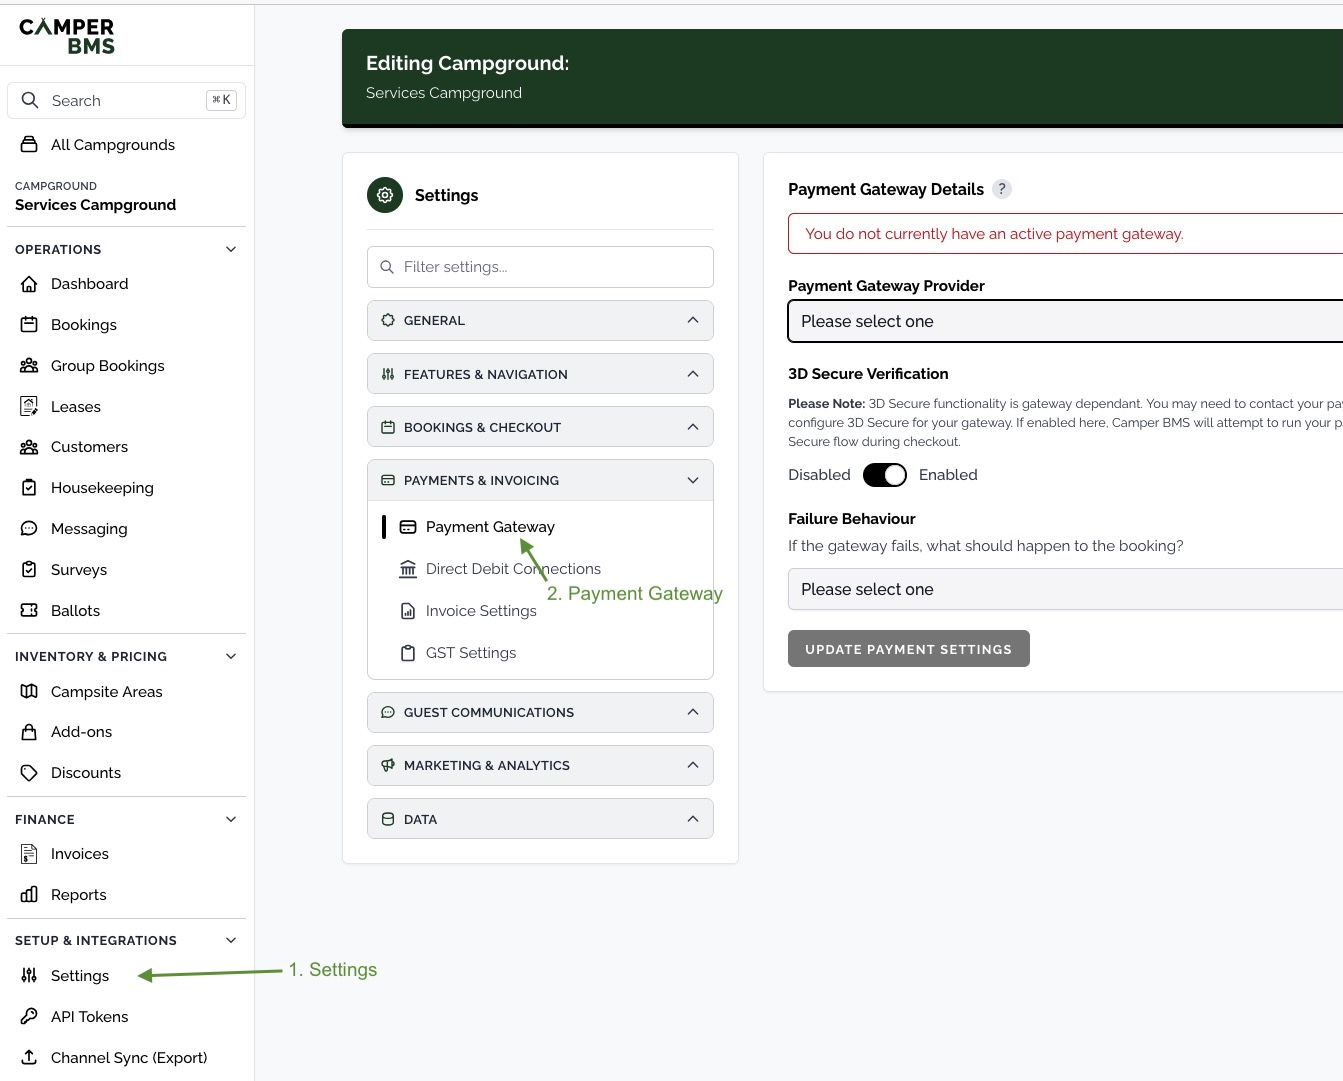
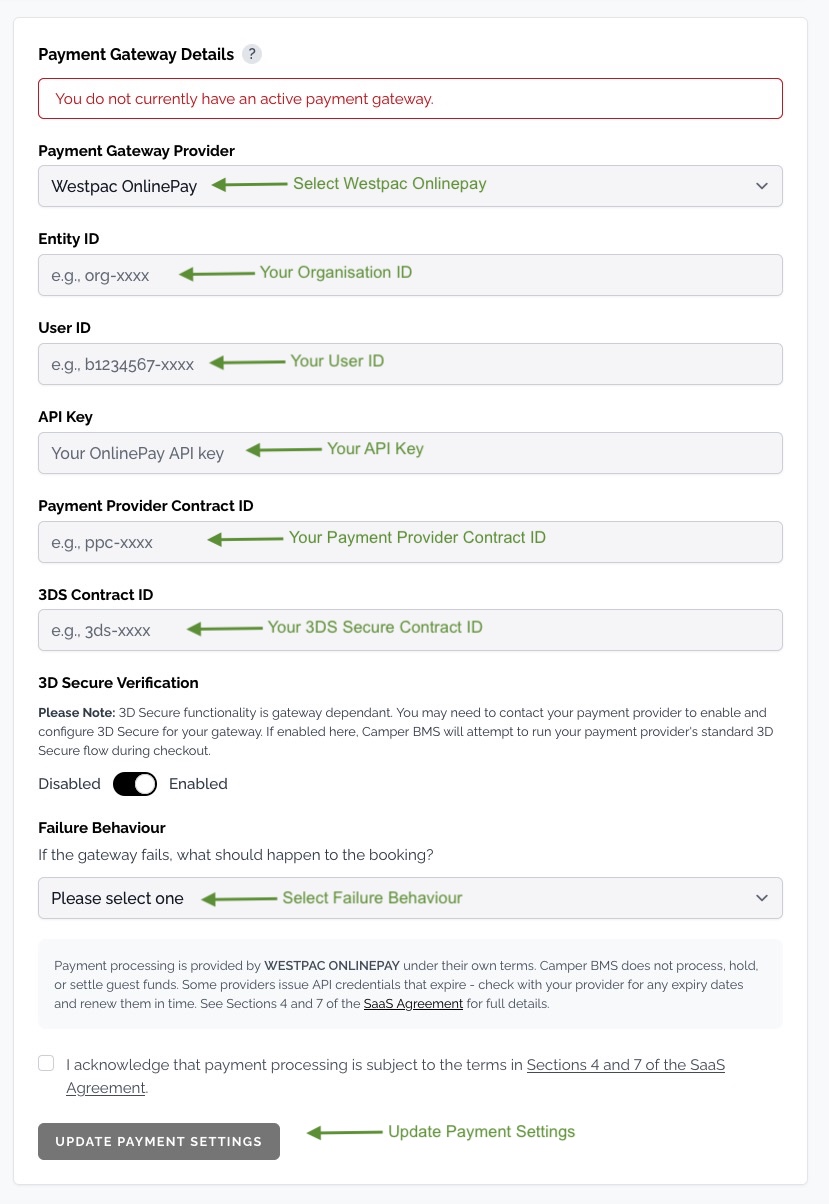
Select Westpac OnlinePay from the Payment Gateway Provider drop-down.
Enter your Entity ID, User ID, API Key, Payment Provider Contract ID, and optionally the 3DS Contract ID in the corresponding fields.
Optionally enable 3D Secure Verification. This requires a 3DS Contract ID, and you may need to contact Westpac to have 3D Secure enabled on your merchant account first.
Choose a Failure Behaviour - this controls what happens to a booking if the gateway declines or fails the payment.
Tick the acknowledgement to accept the payment processing terms, then click Update Payment Settings.
Related articles
Still need a hand?
Our support team is happy to help.
Contact support